Being my first fully native Windows Phone 7 application, Stirling Money provided me lots of opportunities to learn more about the platform. I had written a check register application for Windows Mobile 6 and wanted to take the opportunity to update it to the new Windows Phone platform. Windows Phone 7 is a radical departure from Windows Mobile from both the user’s perspective and the developer’s perspective. Building applications for the older Windows Mobile platform utilized the Microsoft .NET Compact Framework, SQL Server Compact, and a more traditional, battleship gray, Windows Forms user interface (UI). In contrast, Windows Phone 7 uses Silverlight and XAML for the UI and LINQ to SQL to access a local database.
Getting Started
To get started in Windows Phone 7, the first thing I had to do is force myself to forget everything I had learned over almost 12 years of developing mobile applications for the Microsoft Pocket PC/Windows Mobile platform. Windows Phone 7 is such a radical departure that everything I had learned about building UIs and the underlying application architecture went completely out the window. Anyone who has taken the time to become an expert in a given field can tell you just how hard that can be, and it was no different for me. I found myself having to really consciously force myself out of my old Windows Mobile development patterns, but once I got to that point, I was actually very pleasantly surprised at how easy it was to build an attractive interface that performed really well and ran rings around anything I had ever done on the older Windows Mobile platform.
The first big thing that I discovered is that there three invaluable, free toolkits that really ease the development of a Windows Phone application:
- Microsoft Silverlight Toolkit at http://silverlight.codeplex.com
- Coding4Fun Toolkit for Windows Phone at http://coding4fun.codeplex.com
- Microsoft Live SDK (primarily for SkyDrive) at http://dev.live.com
The Microsoft Silverlight Toolkit provides a whole host of native Silverlight controls for Windows Phone that you can drag and drop into the designer and use the Visual Studio properties window to manipulate. The Coding4Fun Toolkit provides more controls that really should have been built into the main framework if you ask me such as AboutPrompt, ProgressOverlay, RoundButton, and many more.
Building the UI
Even with all of these controls, building a UI in XAML is a lot like learning a foreign language. It’s just enough like XML and HTML that I’m familiar with, but with its own twists to throw me off. Data binding in XAML is particularly different than in ASP.NET or the older Windows Forms, so that was probably the biggest difference to get used to. The concept of using a view model in order to make all of the properties available to the UI was familiar to me because I use it all the time in my ASP.NET MVC development, but the binding syntax in XAML and exactly which NotifyPropertyChanged event the binding ends up listening to took some figuring out. I ended up with a number of properties in my view models that looked like the code below, with multiple NotifyPropertyChanged events, in order to get all of the related properties on the page to update when I needed them to.
1 | private ObservableCollection<AccountViewModel> _accounts; |
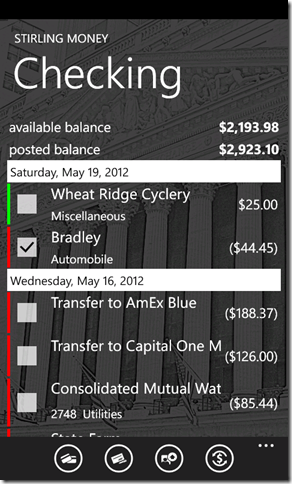
The other thing that I learned in the process is that the XAML editor in Visual Studio 2010, while much improved over previous editions, has some quirks when using static resources inside the phone:PhoneApplicationPage.Resources tag. Editing data templates in that tag doesn’t give the WYSIWYG display that editing a template inside a control does, so I often found myself editing ListItem templates inline so I could see the results in the designer and then moving the template to the Resources section once I had the design solidified. I was pretty amazed at the amount of markup required for seemingly simple tasks. For example, one single row in the list view above required the following markup:
1 | <DataTemplate x:Key="transactionsItemTemplate"> |
Building and Accessing Data
Database support on the phone is provided through LINQ to SQL on top of SQL Server Compact 3.5. Having used the Microsoft Entity Framework extensively in some of my recent work at EffectiveUI, using LINQ to SQL was relatively easy to pick up, though it does have some differences from the Entity Framework syntax that got me a bit in the early going. After that, it was simply a matter of translating from the database model to the view models and everything else just worked, which was way easier than writing the ADO.NET code and scripting the database creation that was required in Windows Mobile.

The other interesting complication was that Windows Phone does not sync files directly with the desktop. The only solution to allow the user to backup and/or restore their data from the phone is to sync with a cloud service such as SkyDrive. Fortunately the Microsoft Live SDK makes this very easy. The following markup is all of the XAML needed to add the Sign in/Sign out button to the page:
1 | <my:SignInButton ClientId="00000000400C1EB8" |
After that, the C# code to handle the SkyDrive session changes was also very simple. All I had to do is listen for the SessionChanged event and check to see if the session status that was reported was Connected as shown in the snippet below.
1 | private void buttonSkyDriveSignIn_SessionChanged(object sender, Microsoft.Live.Controls.LiveConnectSessionChangedEventArgs e) |
Building a Trial Mode Application
Another place where the Windows Phone tools really shined is in building a trial feature into the application. Unlike in the past, where a developer had to deal with all of the registration algorithms themselves, Microsoft does a great job of providing these checks for the developer along with the hooks into the Windows Phone Marketplace to convert from trial to paid. The code to check to see if the application is running on a trial license is very simple as shown below:
1 | private void DetermineIsTrial() |
This method is called when the application is loaded or is activated after the user switched to a different task and set in a static variable in the main app class so that I can check for trial functionality anywhere where that check is needed.
To convert the user to a paid user from the “Buy Now” button, I only have to execute the following code to launch the Marketplace app directly to my application page. If they purchase the application while there, the DetermineIsTrial method will be called when my application is reactivated and the user will automatically see the full functionality.
1 | private void Button_Click(object sender, RoutedEventArgs e) |
Conclusion
Being my first fully native application for Windows Phone 7, I was really pleasantly surprised as to how easy it was to build an attractive, performant app that took advantage of local database storage and cloud backup. Stirling Money took approximately 16 hours of total development time for the first release into the Windows Phone Marketplace. My next project is building a side by side comparison of building a fully-native Windows Phone application and building the same application functionality with PhoneGap/Apache Cordova and doing a comparison of the two approaches in addition to the approach of building a mobile web application within a native shell that I discussed in my article, Develop Hybrid Native and Mobile Web Apps, in the March 2012 issue of MSDN Magazine.
As of this writing, Stirling Money has been certified and published to the Windows Phone Marketplace, although it is not currently searchable yet. When it becomes available, it will be at this link. Prior to that, there is more information on my Windows Phone Software page. I will be publishing an additional post when the application goes live in the Marketplace.